| "A compost pile should be moist like a wrung out sponge." - Unknown "Moisture should be present on all surfaces of all materials" - Rob Dentremont The first phrase above is a common example of conventional composting wisdom. Someone wrote or uttered the words long ago and they have been repeated and re-written, ad nauseum, without challenge. But do those words even make any sense? A sponge absorbs water; compost materials generally do not. So the simile does not apply. How then does one describe the state of properly moistened compost pile? Well, I think phrase 2 does a much better job than phrase 1. But how does one bring the pile to such a state? Let's skip hoses, shower nozzles, and garden forks and cut right to the chase - The Ideal Watering System (IWS). Two versions are presented, V2 and V1. I devised V1 in 1998 and V2 in 2018. For my purposes V2 totally supersedes V1, but the latter is presented below in the event it works better for someone.
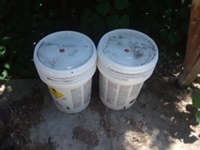
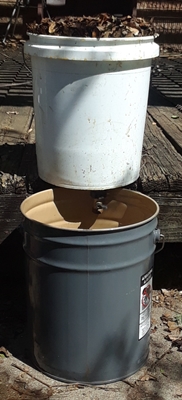
V2 is simply two buckets, one standard w/optional lid and one modified with 1) a bulkhead-to-hose adapter and 2) either a garden hose shut-off valve or just a cap. Another small container to act as a pail can come in handy per below. Steps in the moistening process are:
IWSV1 consists of three elements: a tank, a colander, and a weight, all of which can be had for free or cheap. A simple process yields a perfectly moistened container of material. |
 The tank needs to be large enough to accommodate the colander. These "tanks" once contained pool chemicals. The tank is filled with the liquid of your choice (for me that is laundry water...apparently non-toxic as piles heat up just fine). The tank needs to be large enough to accommodate the colander. These "tanks" once contained pool chemicals. The tank is filled with the liquid of your choice (for me that is laundry water...apparently non-toxic as piles heat up just fine).
|
 The colander is simply a five gallon bucket with holes drilled in the bottom. Pictured is one of many possible drill patterns. With the aid of the weight, the colander gets *crammed* full of material. The colander is simply a five gallon bucket with holes drilled in the bottom. Pictured is one of many possible drill patterns. With the aid of the weight, the colander gets *crammed* full of material. |
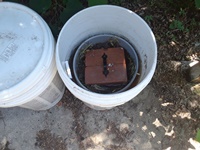 This photo shows the filled colander immersed in liquid and prevented from floating by the weight (two bricks and a handle epoxied together). The soak time depends on the absorbency of the materials and can range from a few seconds to overnight or longer. The materials should be in at least a partially waterlogged state. Live oak leaves are moisture-resistant, but after a night in the tank they begin to turn black. This photo shows the filled colander immersed in liquid and prevented from floating by the weight (two bricks and a handle epoxied together). The soak time depends on the absorbency of the materials and can range from a few seconds to overnight or longer. The materials should be in at least a partially waterlogged state. Live oak leaves are moisture-resistant, but after a night in the tank they begin to turn black. |
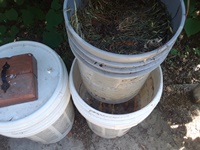 After immersion the colander is removed from the tank and allowed to drain. Not pictured is the convenient beam and hook, but lacking such a luxury the colander can be angled and balanced on top of the tank. After a few to 10 minutes of draining, the material is as close to "a wrung out sponge" as it can possibly get. Or rather, moisture is present on all surfaces of all materials. Try to achieve that with a hose and fork! After immersion the colander is removed from the tank and allowed to drain. Not pictured is the convenient beam and hook, but lacking such a luxury the colander can be angled and balanced on top of the tank. After a few to 10 minutes of draining, the material is as close to "a wrung out sponge" as it can possibly get. Or rather, moisture is present on all surfaces of all materials. Try to achieve that with a hose and fork! |
 IWSV2 originally served as a laundry water "reservoir", to deal with the high flow rate from the washer and the low flow rate through the garden hose as the water travelled from washer to the container outdoors. I had been using it soley for that purpose for several years until I realized its potential superiority over IWSV1. After giving V2 a spin I will not likely ever use V1 again.
| Previous - "Turn A Dial Not A Pile" | Next - "Food Scrap Preparation" |